If I were starting cybersecurity today, I’d do 3 things first: build an isolated lab, learn Nmap and Wireshark, and document every test like a case study.
That’s the short answer. The article boils beginner tooling down to six areas: lab setup, network review, web/offense, log analysis, malware triage, and system basics. The point is simple: don’t try to learn 50 tools at once. Learn a small set, use them in the same lab more than once, and save proof of what you did.
Here’s the fastest path the article lays out:
- Start with a lab first using VirtualBox or VMware
- Use safe targets only like Metasploitable 2, DVWA, and WebGoat
- Learn network basics before exploit tools
- Pick tools based on the job path you want
- Turn each lab into a resume project
A few numbers stand out:
- 16 GB RAM is the sweet spot for a beginner lab
- 8 GB RAM is the bare minimum
- Windows eval versions last 90 days
- Short packet sessions of 5 to 10 seconds are often enough for first Wireshark tests
If I wanted the shortest tool shortlist from this article, it would be:
- VirtualBox or VMware for lab work
- Nmap for host and port checks
- Wireshark for packet review
- Sysinternals for Windows checks
- Metasploit, Burp Suite, or OWASP ZAP for attack-path testing
- Splunk, Wazuh, or ELK for logs
- VirusTotal, REMnux, FLARE VM, and Ghidra for file triage
Quick Comparison
| Area | Best first focus | What I’d use it for |
|---|---|---|
| Lab | VirtualBox / VMware | Run isolated VMs and reset with snapshots |
| Network | Nmap / Wireshark | Find ports, inspect packets, see what scans look like |
| Windows system | Sysinternals | Check processes, startup items, and file activity |
| Web / exploit | Burp Suite / ZAP / Metasploit | Test web apps and lab-only exploit paths |
| Logs | Splunk / Wazuh / ELK | Review failed logins, alerts, and event data |
| Malware triage | VirusTotal / REMnux / FLARE VM / Ghidra | Check suspicious files and note IOCs |
The main takeaway is clear: build a safe lab, learn a few core tools well, and show your work. That’s what turns practice into job-ready proof.
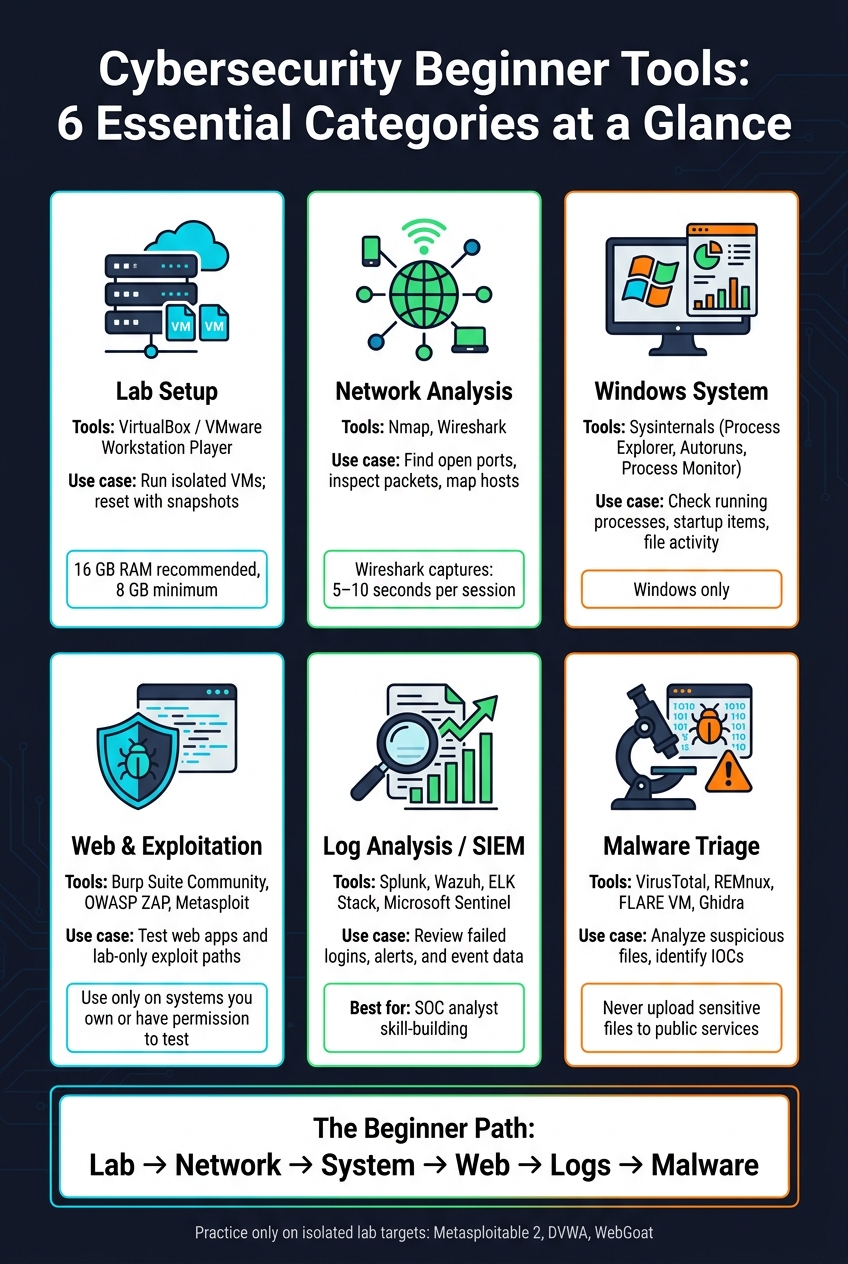
Cybersecurity Beginner Tools: 6 Essential Categories at a Glance
5 Cybersecurity Tools Every Beginner must Learn
sbb-itb-8a31326
Build a Safe Beginner Lab Before Using Security Tools
Use only an isolated lab. Testing on live systems or even your home network can create legal trouble and security problems.
A local lab gives you a controlled space to test tools without the usual risk. You can break things, reset them, and run the same exercise again until it clicks. That matters a lot when you're new. Use the lab for repeatable beginner projects, not random one-time demos.
Starter Hardware and Virtual Machines
A modern i5 or Ryzen 5 system with 16 GB RAM and a 500 GB SSD is enough for a beginner lab. 8 GB RAM is the minimum for running one VM, but 16 GB gives you much more room if you want a few machines running at once.
For virtual machines, Kali Linux, Ubuntu, and Windows evaluation media cover basic Linux and Windows lab work. Microsoft provides 90-day free evaluation versions through the Microsoft Evaluation Center.
A simple setup looks like this:
- Kali Linux: 2–4 vCPUs and 4–8 GB RAM
- Windows: 4 vCPUs and 4–8 GB RAM
After installation, take a clean snapshot. Then take another snapshot before each new project. That way, if something goes sideways, you can roll back in minutes instead of rebuilding from scratch.
VirtualBox vs VMware Workstation Player
Both options are free and more than enough for a beginner lab. The main difference is pretty practical: snapshots and host OS support.
| Feature | Oracle VM VirtualBox | VMware Workstation Player |
|---|---|---|
| Host OS Support | Windows, macOS, Linux | Windows, Linux |
| Performance | Good | Excellent |
| Snapshots | Unlimited / Included | Limited in free version |
If you're on macOS, go with VirtualBox. If you're on Windows or Linux, VMware Workstation Player usually gives better performance, but the free version has limits on snapshots.
For networking, use NAT first so your machines can get updates. After that, switch to Host-Only or Internal networking for lab work. Host-Only keeps traffic between your host and VMs. Internal keeps traffic only between VMs. That's the safer setup once you're ready to practice.
Once the lab is isolated, the next step is setting up the core tools inside it.
Safe Practice Targets for First Projects
Use only intentionally vulnerable practice targets. Put them on their own VM and place that VM on an Internal network. These are a good fit for beginner project write-ups because they're made for safe practice.
- Metasploitable 2 - Intentionally vulnerable Linux VM
- DVWA (Damn Vulnerable Web App) - Vulnerable web app for beginner practice
- WebGoat - OWASP training app for web security lessons
These are the systems you'll use to practice scanning, traffic review, and web testing without drifting into unsafe territory. A lab starts to pay off when it becomes a repeatable project space, not just a pile of VMs.
Core Network, System, and Offensive Tools to Learn First
With your lab in place, start with tools that give you proof: scan results, packet captures, and Windows system artifacts. That means learning the tools that let you see network traffic, inspect systems, and trace attack paths without guesswork.
Nmap, Wireshark, and Sysinternals for Basic Investigation
Nmap is usually the first stop for beginners. It turns a network from a black box into something you can map: live hosts, open ports, services, version details, and OS hints. Use the -oA flag to save output in normal, grepable, and XML formats.
Wireshark lets you look at traffic at the packet level. You can inspect DNS queries, HTTP requests, and, in a lab, even spot cleartext credentials or tokens. Keep your captures short. 5 to 10 seconds, or a single action, is often plenty.
Sysinternals handles the Windows side of the job. Tools such as Process Explorer, Process Monitor, and Autoruns help you check what is running, what is writing to disk, and what is set to launch at startup. If a Windows VM starts acting strange, these tools help you figure out why.
| Tool | Primary Purpose | Beginner Tasks | Platform |
|---|---|---|---|
| Nmap | Network discovery & security auditing | Finding live hosts, scanning ports, service detection | Cross-platform |
| Wireshark | Network protocol analysis | Capturing and inspecting packet data in real time | Cross-platform |
| Sysinternals | Windows system troubleshooting | Monitoring processes, checking autoruns | Windows |
One small but easy-to-miss detail: both Nmap SYN scans (-sS) and Wireshark live captures need administrator or root access because they work with raw network packets.
Once you can gather this kind of evidence, controlled exploitation and web testing start to make a lot more sense.
Metasploit, Burp Suite Community Edition, and OWASP ZAP
These tools cover controlled exploitation and web app testing. They are often used against targets such as Metasploitable 2 inside an isolated lab.
Metasploit Framework is free and open-source. It gives you modules for scanning, exploitation, payload delivery, and post-exploitation. A simple workflow works well here:
- Reconnaissance
- Scanning
- Exploit selection
- Payload delivery
- Post-exploitation
Before your first session, initialize the PostgreSQL database with msfdb init so Metasploit can store session data and scan results. For project evidence, take screenshots of successful shells or command execution on the target VM, and log the modules and payloads you used. That habit pays off later when you need to explain what happened instead of just saying, “It worked.”
Burp Suite Community Edition and OWASP ZAP both focus on web application security, but they teach different habits. Burp Suite, in its free version, is mostly manual. That makes it a strong way to learn how HTTP requests and responses actually move back and forth. OWASP ZAP leans more toward automation and is fully open-source. Both are free.
| Tool | Use Case | Manual vs. Automated | Licensing |
|---|---|---|---|
| Metasploit | General exploitation & post-exploitation | Both (modular) | Open Source |
| Burp Suite Community Edition | Web application security testing | Primarily manual | Freemium |
| OWASP ZAP | Web application security testing | Both (strong automated features) | Open Source |
Use only systems you own or have written permission to test.
Use Hashcat once you can already collect hashes and explain, in plain terms, why weak passwords are a problem.
Hashcat for Password Auditing in a Lab
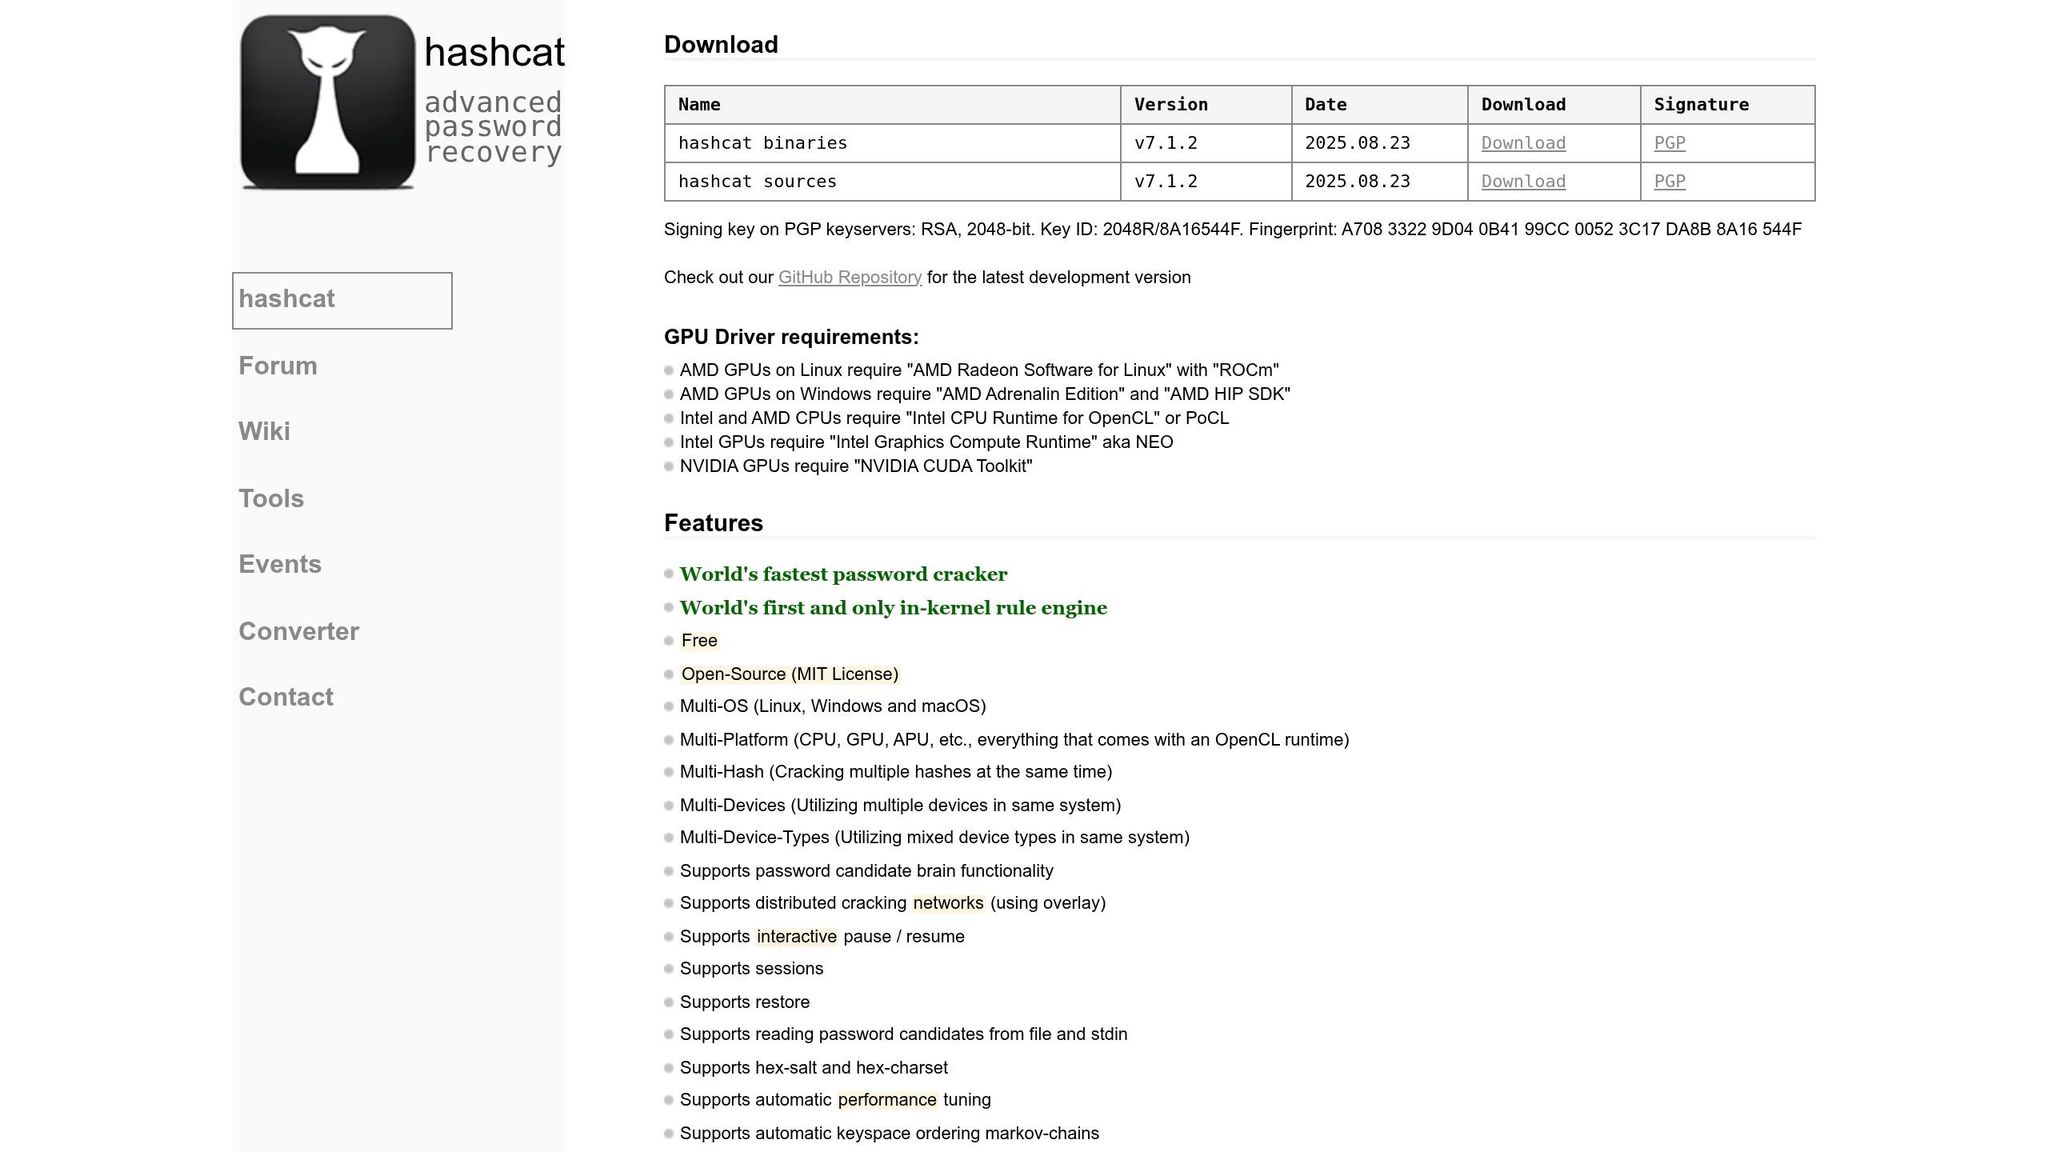
Hashcat is a password auditing tool used to crack hashes with wordlists in a controlled environment.
In a lab, it helps you show how fast weak passwords can fall once someone has the hash file. That makes it useful for projects tied to password-policy fixes and system hardening. A simple workflow looks like this: collect a hash from a lab VM with a tool such as Metasploit’s hashdump command, then run Hashcat against it with a wordlist. Record the crack time, the password strength, and the lesson for password policy.
From there, you can branch into SIEM and malware-analysis tools and start building projects with a broader range of evidence.
SIEM, Malware Analysis, and Other Tools That Add Depth to Beginner Projects
Once you can map a system and capture traffic, it helps to add tools for logs and file triage. After scanning and exploitation, the next move is learning how to investigate logs and suspicious files.
SIEM and Log Analysis Tools Beginners Should Know
SIEM stands for Security Information and Event Management. A SIEM pulls in logs, normalizes them, and flags suspicious activity. For entry-level SOC work, SIEM practice shows core skills like monitoring alerts, investigating suspicious activity, adding context, following runbooks, and documenting incidents.
Splunk is common in enterprise teams and works well for practicing log searches and dashboards. Wazuh is a good starting point because it is open source and mixes SIEM with EDR features. ELK Stack (Elasticsearch, Logstash, Kibana) takes more setup, but that setup teaches you how log ingestion and indexing work. Microsoft Sentinel is a solid path if you want to learn cloud-native security on Azure.
| Tool | Cost / Home-Lab Access | Complexity | Cloud vs. On-Prem | Beginner Project Fit | SOC Relevance |
|---|---|---|---|---|---|
| Splunk | Free trial or home-lab access | Moderate | Both | High - industry standard for searching and dashboards | Very High |
| ELK Stack | Open-source; requires manual setup | High | Both | High - teaches data ingestion and indexing | High |
| Wazuh | Open-source; easy to deploy | Moderate | Both | Excellent - combines SIEM with EDR features | High |
| Microsoft Sentinel | Pay-as-you-go | Moderate | Cloud-native | Good for Azure learners | High |
These tools fit the kind of log-review projects that show SOC readiness. A smart place to start is authentication logs. Failed logins make one of the easiest beginner projects for brute-force and unauthorized-access detection.
VirusTotal, REMnux, FLARE VM, and Ghidra for Malware Triage
The next step is file triage: figure out what a suspicious file does before you go deeper.
Use VirusTotal as a first pass on suspicious files. One rule matters here: never upload sensitive or proprietary files to public services like VirusTotal because those files are shared with security vendors. When you can, use hashes instead of raw files.
Use these tools when a file looks suspicious and you need to show what it does. REMnux and FLARE VM give you pre-configured, isolated environments so you can examine a file without exposing your host system. REMnux is Linux-based and geared toward malware analysis and reverse engineering. FLARE VM runs on Windows and is built for analyzing Windows executables and scripts. Ghidra is a free, open-source reverse engineering tool for static analysis, where you inspect code without running it.
| Feature | REMnux | FLARE VM |
|---|---|---|
| Primary Focus | Malware analysis and reverse engineering | Windows-based malware analysis |
| Operating System | Linux (Ubuntu-based) | Windows |
| Included Tools | Static/dynamic analysis, deobfuscation | Debuggers, disassemblers, hex editors |
| Resource Requirements | Low to moderate | High |
| First-Project Suitability | High - ready to use | High - standard for Windows analysis |
A good beginner malware project should end with the file’s behavior, key IOCs, and a short detection summary.
How to Turn These Tools Into Resume-Ready Cybersecurity Projects
Once your tools are working, don't stop at the lab. Turn each exercise into a case study.
That's where the project starts to matter on a resume. A tool by itself doesn't say much. What matters is the evidence you produced and how well you can explain it.
Each project should end with a short write-up that covers:
- the goal
- the commands you ran
- screenshots
- next steps
That last part matters more than people think. It shows judgment, not just tool use. It also makes each project much easier for someone else to review and much easier for you to build on later.
Project Ideas That Combine Scanning, Traffic Analysis, and Exploitation
A good beginner project for offensive skills can run through three stages inside your lab.
Start by scanning a test VM or another authorized target with Nmap to find open ports and service versions. Then open Wireshark and capture the traffic while the scan runs. This lets you see what reconnaissance looks like on the wire. After that, use Metasploit to validate one known vulnerability on that same target. Then check host logs with Sysinternals on Windows or journalctl on Linux. Save the key outputs: scan results, packet captures, and host logs.
Take screenshots and build a short attack timeline. In the write-up, use labels such as service enumeration, vulnerability validation, and impact assessment. A GitHub README works well here, especially with headings like Scope, Methodology, Findings, and Remediation.
Projects for SOC, Detection, and Malware Basics
Not every good beginner project needs exploitation. Detection work and malware triage can be just as strong.
For a detection-focused project, trigger a failed login sequence on purpose, review the Windows or Linux logs that come from it, and build a simple alert rule around that activity. Then document the alert logic, the raw log evidence, and the triage steps you'd follow as a Tier 1 SOC analyst.
For a malware basics project, keep the work inside a lab and focus on triage. Write down the behavior you observed, the indicators you found, and one detection recommendation.
Treat each project like a case study. Explain why each step mattered. Include dead ends too. They show how you troubleshoot when things don't go to plan.
Conclusion: Start With a Lab, Learn the Core Tools, and Document Everything
Start with an isolated lab. Document every exercise. Get good with a small set of tools before you branch out.
If you're working toward your first cybersecurity job and want a clear path from lab practice to a real role, Root School is built for that. It's a resource for aspiring cybersecurity professionals learning how to land their first job.
FAQs
Which tools should I learn first?
Start with three core areas: networking, operating systems, and basic programming.
Networking means learning how systems talk to each other. That includes TCP/IP, DNS, firewalls, and how data moves from one place to another.
Operating systems means getting comfortable with both Linux and Windows. Focus on the Linux command line and Windows administration, since you'll use both all the time.
Basic programming gives you a way to automate tasks and understand what's happening under the hood. Here, the focus is on Python and PowerShell.
Root School also recommends hands-on practice with TryHackMe and OverTheWire. That's smart advice. Reading helps, but actual practice is where things start to click.
How do I build a safe beginner lab?
Prioritize isolation so your experiments don't affect your home network or the public internet. A mid-range computer with 16 GB of RAM and a 500 GB SSD is a good fit, and you can run your operating systems inside a secure sandbox with Oracle VirtualBox.
For safety, skip bridged mode. Use Host-Only or internal NAT networks, practice only on intentionally vulnerable machines, and test only systems you own or have explicit written permission to use.
How can I turn lab work into resume projects?
Move past simple checklists and show how you work. Document your methodology, evidence, and risk assessment. Add a Technical Projects section to your resume, and use the STAR method to turn your lab work into a clear professional story.
Define the authorized scope, then focus on your investigation process. Include your findings, the evidence you gathered, and your remediation recommendations. Root School helps aspiring cybersecurity professionals build these hands-on skills and prepare for their first job.